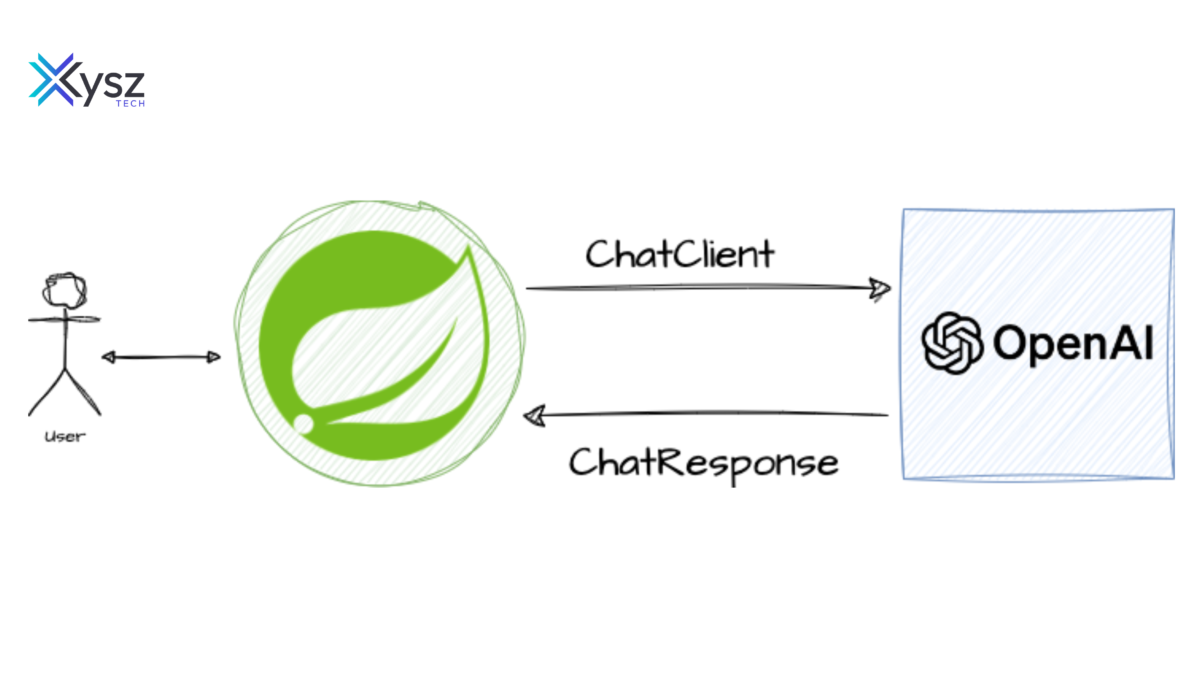
Interact with OpenAI using Spring AI!

In the evolving landscape of technology, integrating advanced AI tools like OpenAI’s ChatGPT into your applications can enhance user experience by making interactions more dynamic, responsive, and intelligent. In this blog, we’ll walk through a simple example of integrating ChatGPT with a Spring Boot application.
Prerequisites
Before we dive in, ensure you have the following setup:
- JDK 11 or higher
- Maven
- A valid OpenAI API key
We will cover three methods in this series:
- Interacting with OpenAI or any LLM using Chatclient (specifically focusing on OPENAI).
- Using PromptTemplate.
- Using OutputParser.
Following these, we will explore Spring AI RAG utilizing Embedding Models and Vector Databases. In our case, we will be using the PGVector database.
Introduction
Spring AI provides a convenient way to interact with various Language Model Models (LLMs) such as OpenAI, Azure Open AI, Hugging Face, Google Vertex, Ollama, Amazon Bedrock, etc. In this documentation, we will focus on interacting specifically with OpenAI using Spring AI's Chatclient.
Prerequisites
- OpenAI API Key: Before using Spring AI's Chatclient with OpenAI, you need to obtain an API Key from OpenAI. You can create a new API key by visiting OpenAI API Keys and following the instructions provided.
Step 1: Set up OpenAI API Key
- Create a new API key on the OpenAI platform.
- Once you have the API key, set the environment variable OPENAI_API_KEY with the API key.
- Store the API key into your Spring Boot application's application.properties file.
spring.ai.openai.api-key=${OPENAI_API_KEY}
spring.ai.openai.chat.options.model=gpt-3.5-turbo
spring.ai.openai.chat.options.temperature=0.7
Step 2: Create a New Spring Boot Project
- Go to Spring Initializr.
- Select the desired project metadata (e.g., Group, Artifact, Name, etc.).
- Add the following dependencies:
- web: For building web applications.
- openAi: For integrating Spring AI with OpenAI.
Step 3: Implementing Chatclient Interaction with OpenAI
Now that we have set up the necessary configurations, let's implement interaction with OpenAI using Spring AI's Chatclient.
- Create a new controller in your Spring Boot project, let's name it ChatController.
- We inject the ChatClient bean provided by Spring AI into our controller.
- Define a method in ChatController to handle client requests. We'll name it sendMessageToOpenAI for demonstration purposes.
- Inside sendMessageToOpenAI method, call the call method of ChatClient abstraction provided by Spring AI.
- Pass the message to the call method, which internally interacts with OpenAI without exposing the specific implementation details.
import org.springframework.ai.chat.ChatClient;
import org.springframework.web.bind.annotation.GetMapping;
import org.springframework.web.bind.annotation.RequestParam;
import org.springframework.web.bind.annotation.RestController;

@RestController
public class ChatController {


    private final ChatClient chatClient;


    public ChatController(ChatClient chatClient) {
        this.chatClient = chatClient;
    }


    @GetMapping("/send-message-to-openai")
    public String sendMessageToOpenAI(
    @RequestParam(value = "message", defaultValue = "Tell me a joke") String message) {
        return chatClient.call(message);
    }
}
You are now able to run the application and test the chat API:
You should receive a response generated by ChatGPT.
Conclusion
By following these steps, you can seamlessly integrate OpenAI’s ChatGPT into your Spring Boot application, enabling it to generate dynamic and intelligent responses. This integration can enhance your application’s interactivity and provide a more engaging user experience.
Feel free to expand upon this basic integration by adding more features such as error handling, input validation, and enhancing the user interface for a complete and robust application. Happy coding!
Comments (0)
No comments found.